Detail from "Rain Dance," an original quilt by Sherrie Spangler

Wednesday, November 28, 2012

Comfort quilts, cherries and Bunners


Today was Comfort Quilt day, and we had unexpected sunshine coming through the windows to brighten up the quilts. That's Carol, above, who started the Gig Harbor Comfort Quilt Project. Under her leadership, about 1,080 quilts have been donated so far to local cancer patients. I blogged about it here when we reached 1,000 donations: http://sherriequilt.blogspot.com/2012/02/1000-comfort-quilts.html


Don't you love how Audrey's clothes and glasses go with the quilt she has on the design wall?


We sewed, cut, ironed and ate for an enjoyable morning and afternoon.


Here's my contribution ... I sewed two triangles on each of 90 beige blocks.


 Nancy arranges some of her blocks on the design wall.


Here's a gorgeous orange and salmon quilt, ready to go to the cancer center where we hope it will brighten and warm someone's day.


Moving on to cherries:

Last Christmas, the Twisted Nut Stitchers (my little sewing group of five) exchanged friendship blocks that we made for each other. I gave each of them a piece of cherry fabric to use in my blocks, and now I'm turning them into a table runner to show at this year's Christmas meeting. I made each of them a house block with their fabric, so I made one for myself to put in the runner.


Last but not least: BUNNERS. Look at those furry little toes!


Have a colorful day


Thursday, November 22, 2012

Hoppy Thanksgiving


Bunners hopes you all have a hoppy Thanksgiving with piles of greens and carrots. Even Starbucks has bunnies on the brain this holiday season -- I bought a pumpkin scone and it came in this cute bunny bag.


Have a colorful Thanksgiving


Friday, November 16, 2012

All smiles at the bazaar

 
I'm so glad I took people photos at the New Neighbors holiday bazaar yesterday, because I love looking at their smiles now. These three lovely ladies are wearing my scarves that they bought, and the colors go perfectly on them!


I also got pictures of some of the vendors. Judy sat across from me with her beautiful knitwear. Her husband makes the wooden pen sets.

Al and his wonderful bird houses were on one side of me. (You may have seen his booth at the Gig Harbor Farmer's Market in Uptown and downtown.) After talking a bit between customers, we discovered that he went to the same university as my son in Colorado and that both of us are writers as well as artists. He also farmed for many years, which explains the barn birdhouse.

Pam of Pam's Pearls had a great idea for displaying her bracelets, using stretchy gloves that she stuffed. Fun and functional.


Here's my table, with necklace displays that I got at a store that was going out of business.


For the past two years I've added cards to my stock. I wait for Snapfish to have one of its "100 prints for $1" specials, then I order my nature and quilt photos to use on the cards.


I'm convinced that the bowls owe their popularity to their bright colors, which is something we all need more of in the Northwest in the fall and winter. Pam snapped up the blue and white bowl to give as a gift.
 
I resisted the call of the baked goods until the end, then I succumbed to a cranberry/orange/walnut loaf with a cheery red ribbon. It was a delicious way to end a good day.


Have a colorful day


Tuesday, November 13, 2012

Golden apple scarf


Today's scarf is inspired by this bowl of golden-green apples that I picked from our trees yesterday.


Step 1: Select juicy tidbits of fabric and yarn from the stash. Arrange them between layers of Sulky Solvy in the shape of the scarf. I used the sticky Fabri-Solvy on the bottom and regular non-sticky Solvy on top. The non-sticky layer is cheaper, but it stuck to the bottom layer so I didn't have to pin baste.


Step 3: Sew a grid with yellow and yellow-orange rayon threads.

Step 4: (No photo.) Rinse away the Solvy and squeeze the scarf dry in a towel.


 Step 5: Wrap the apples in their matching scarf.


This is the color of today, all day. This is why I made a YELLOW scarf today.


Have a more colorful day

Friday, November 9, 2012

An easier way


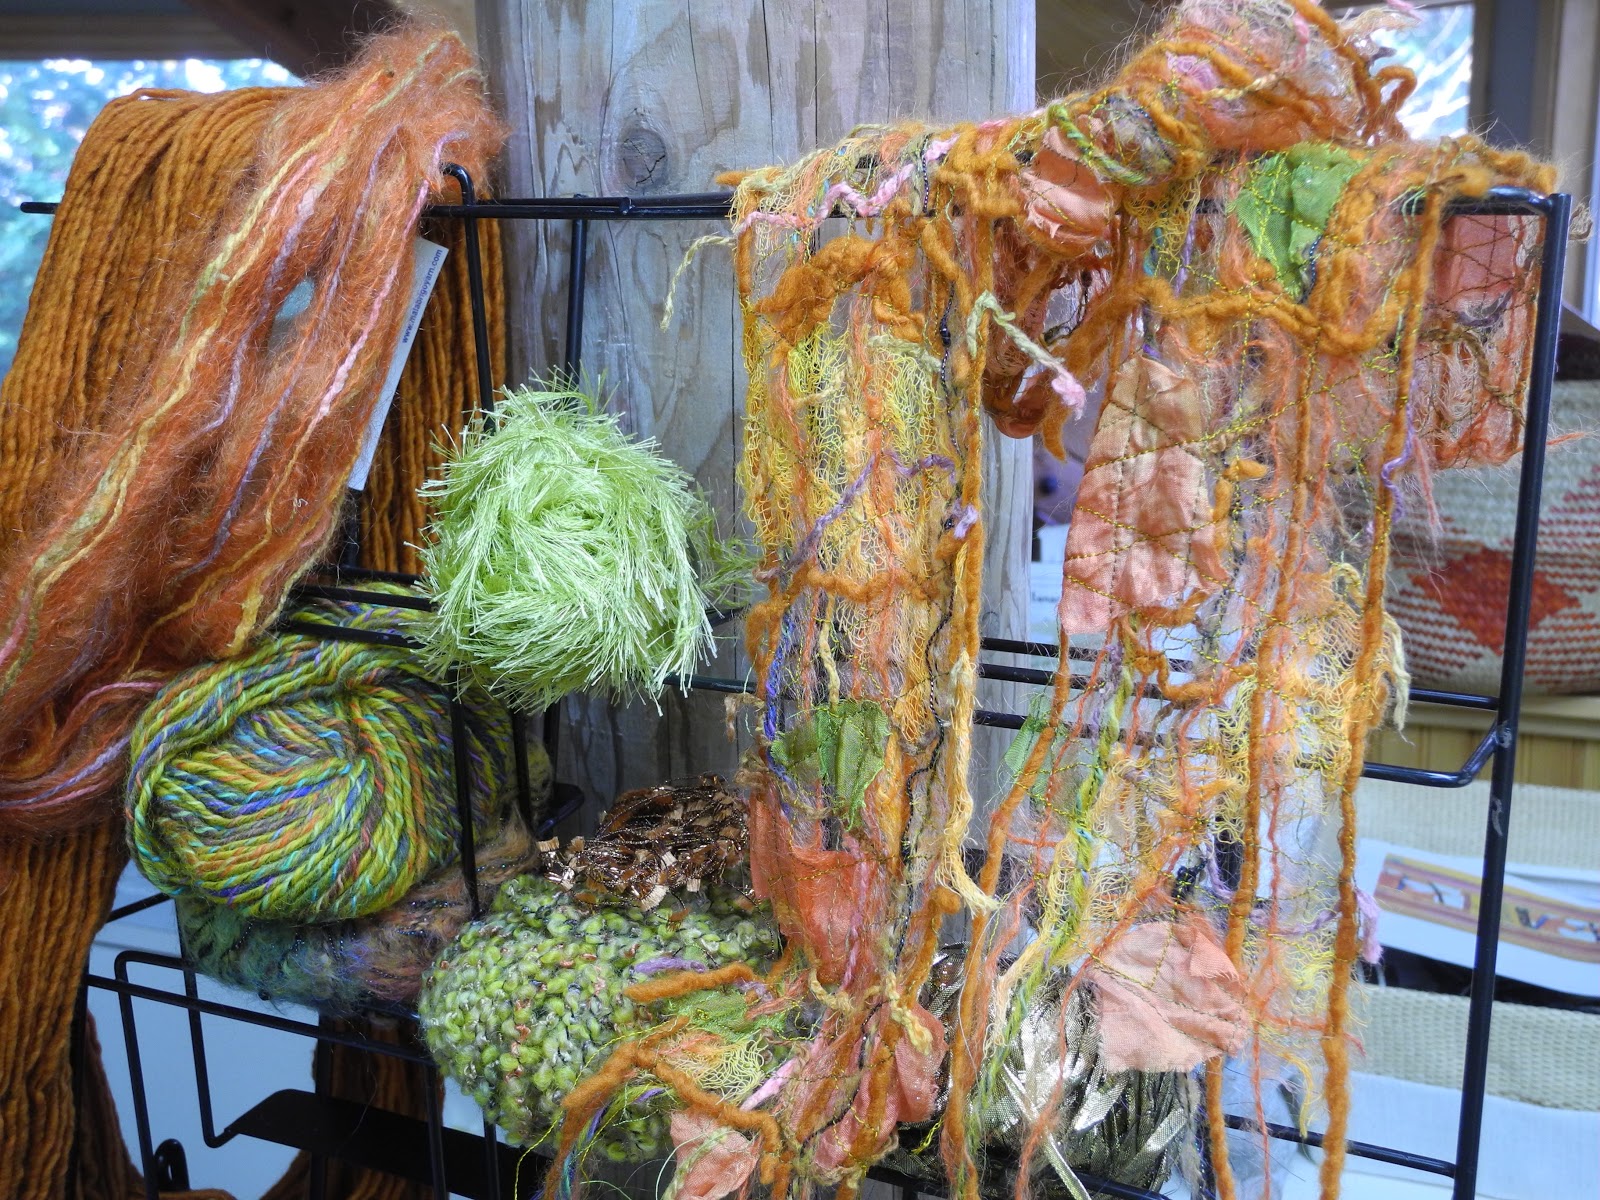
Today I made a scarf using a new sticky Sulky Solvy 
AND IT WAS SO MUCH EASIER!
 (And so much more expensive.)

I bought a roll of this awhile ago using a half-price coupon, but since it was so expensive I was saving it. But last night I used up the last of the regular Solvy, so I gave this a try. It's wonderful. All the little fabric and yarn snippets stay right where you put them, and you don't have to pin it all together.
It's called STICKY FABRI-SOLVY. Here's the link: http://www.sulky.com/stabilizers/stickyfabrisolvy.php


The stitching went SO much faster since I didn't have to keep stopping to remove safety pins. And this product has a heavier, fabric-like feel that makes it a lot easier to control under the needle than the flimsy regular Solvy.


It took longer to rinse out, but most of the stickiness was still gone in less than five minutes. I squeezed it in a towel, hung it up to dry and it was ready to wear in no time.


The only downside I can see is the price. My 12"-wide, 6-yard roll was priced at $29, and I use 60" per scarf. That's only 3 1/2 scarves per roll, or about $8 a scarf. (Don't hold me to this -- I'm doing these calculations in my head and rounding numbers.) I'll need another half-off coupon before I buy more.

  
Have a colorful day


Thursday, November 8, 2012

My "wisp of color" scarves


I'm done with the fabric bowls, and this week I'm working on another fall ritual: scarves. Due to tendonitis, I had to stop knitting scarves about six years ago, but now I've found a painless way to turn all that yarn and fabric snippets into scarves.

My latest Sulky Solvy scarf, with my yard goddess.
I blogged about this last year, but here's a quickie tutorial on making the Sulky Solvy scarves. This year I'm adding more fancy fabrics.

Step 1: Pull out your fiber ingredients.
First you pull out a bunch of yarn, decorative threads, scraps of pretty silk, organza, lame, painted cheesecloth (above) and anything else you like. Leather and feathers would be fun -- must try that sometime. Make sure the fabric looks good on both sides, since both sides will show.

Steps 2-3: Sandwich snippets between Sulky Solvy and stitch.
Cut a piece of Sulky Solvy (I used the original). Mine is in a 12-inch-wide roll, so I cut a piece 12 inches by about 60 inches. Lay it on your table and cover half the width (6x60 inches) with your ingredients, leaving longer pieces of yarn hanging off both ends to make fringe. Fold the other half over to sandwich everything together. Pin around edges with safety pins, carefully roll it up, and take it to the sewing machine.

Sew everything down in a grid -- I space mine about 3/4 inch apart. You can also sew diagonally or randomly; just be sure to catch everything with sewing otherwise it will fall out when you dissolve the Solvy. Make sure the bobbin thread looks good, because it will show. Gold thread is REALLY nice, but regular old cotton is fine, too.

If your machine foot sticks to the Solvy, blow on it with a blow dryer. I had to do that last year, but this year I didn't have a problem. 

This shows how I sewed a grid and some diagonal lines.
Hold the stitched piece under running water to dissolve most of the Solvy, then swish it around in the sink for a few minutes. Squeeze the little wad (it looks pathetic at this point and I didn't get a picture), then roll it in a towel to get most of the water out. Hang it to dry, or dry on a towel. If you want to iron it because the fabric is too wrinkled, use a press cloth or low heat if there is even one smidgeon of a delicate thread in there.

Wear your colors proudly, with Sheila and Helen!
I took the orange scarf out for a test drive yesterday to the Chihuly exhibit at Seattle Center (those are his Pendleton blankets) and decided that it goes well with the purple jacket. I'll have to make another one to sell at the bazaar.

More scarves from the last few days.
  

Yarn looks so fabulous in big hanks that I usually leave it that way instead of rolling it into balls. When I knitted, I saw the value of having it in balls so it would unwind easily, but now I love to drape it around the studio. If I lived alone, it probably would be draped all over the house.


I got this display rack last week at Shibori Dragon, which is closing its retail store and selling its fixtures. (It'll still do mail order and sell at the quilt shows. It's a great store, with fabric, yarn, beads, books and surface design stuff.) I also got four nice necklace display busts that'll be perfect for the scarves.


I started buying beads just to embellish my quilts, then I bought so many that I had to start making and selling jewelry to pay for the beads! Does this resonate? Now I finally have a proper way to display them. (No, I didn't make ALL of these.)


Hope this inspires some of you to make scarves. For more details, see last year's posts:

http://sherriequilt.blogspot.com/2011/10/silk-and-yarn-no-knit-scarves.html
http://sherriequilt.blogspot.com/2011/10/blow-drying-solvy.html

http://sherriequilt.blogspot.com/2011/10/stormy-sunset-scarf.html


Have a colorful day